Install & Configure PostgreSQL on Mac

As a developer or data enthusiast, you may have heard of PostgreSQL, a powerful open-source relational database management system. While it's widely used in many industries, setting up and configuring PostgreSQL can be intimidating for those new to the technology. In this article, we'll walk through the process of installing and configuring PostgreSQL on your Mac using Homebrew
Installing PostgreSQL
The first step is to install PostgreSQL using Homebrew, a popular package manager for macOS. Open terminal and run the following command:
brew install postgresqlThis will download and install PostgreSQL on our system.
Starting the PostgreSQL Service
Once installed, we need to start the PostgreSQL service. Run the following command:
brew services start postgresqlThis will start the PostgreSQL service, allowing you to interact with it using the psql command-line tool.
Configuring the Database
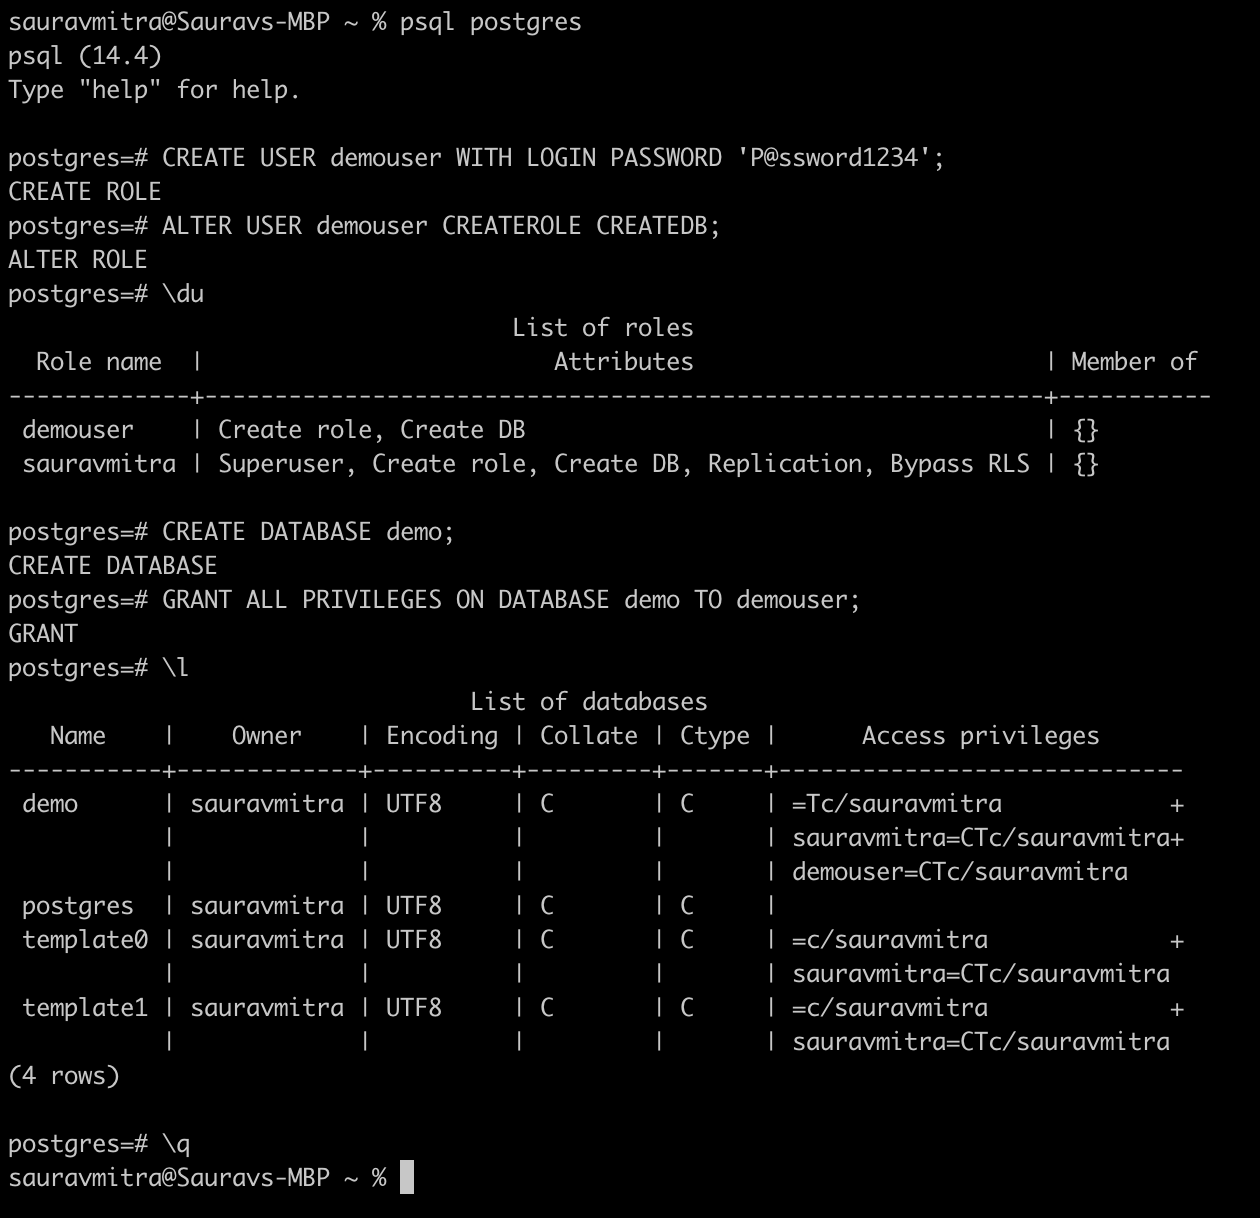
Now that the service is running, let's create a new user and database. Open terminal and run the following commands:
psql postgres

CREATE USER demouser WITH LOGIN PASSWORD 'P@ssword1234';
ALTER USER demouser CREATEROLE CREATEDB;

\du
These commands will create a new user named demouser with a password of P@ssword1234. The \du command is used to display the list of users in the PostgreSQL database.
Creating a New Database
Next, let's create a new database:
CREATE DATABASE demo;
GRANT ALL PRIVILEGES ON DATABASE demo TO demouser;

\l

\q
The CREATE DATABASE command creates a new database named demo, and the GRANT command grants all privileges on that database to the demouser. The \l command is used to display the list of databases in the PostgreSQL database.

Testing the Database
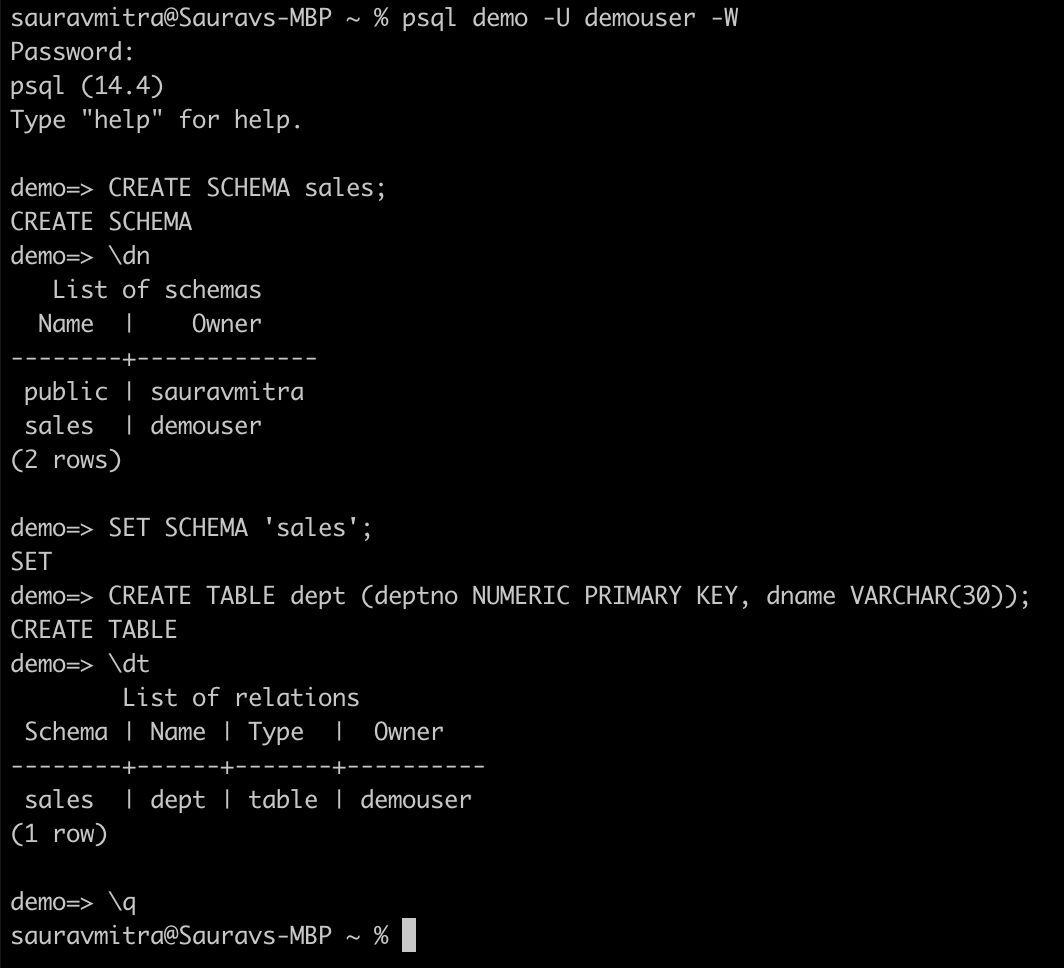
Finally, let's test our new database:
psql demo -U demouser -W

CREATE SCHEMA sales;

\dn

SET SCHEMA 'sales';
CREATE TABLE dept (deptno NUMERIC PRIMARY KEY, dname VARCHAR(30));

\dt

\q
These commands will connect to the demo database using the demouser account, create a new schema named sales, and then create a table named dept. The \dn command is used to display the list of schemas in the database.

In this article, we've walked through the process of installing and configuring PostgreSQL on our Mac using Homebrew. With these steps, we should now have a fully functional PostgreSQL installation, complete with a new user, database, schema, and table. Whether you're a developer or just starting out with PostgreSQL, this guide should provide a basic setup for getting started with this powerful database management system.

