
Setup Apache Spark with Jupyter Notebook on MacOS


Are you interested in exploring the world of big data and machine learning? Look no further! In this article, we'll take you through a quick and easy guide to installing and configuring Apache Spark with Jupyter Notebook on your MacOS device.
Before we dive into the Apache Spark & Jupyter setup process, let's make sure we have the necessary prerequisites installed. We'll need Python 3, pip and Java.
Install Python3
The first step is to install Python 3 using Homebrew, a popular package manager for MacOS. Open your terminal and run the following command:
brew install python@3.11Once installed, verify the version by running:
python3 -VInstall pip
Next, we need to install pip, the package installer for Python. Run the following command:
python3.11 -m pip install --upgrade pipInstall Java
Install Java using Homebrew. Open your terminal and run the following command:
brew install javaOnce installed, verify the version by running:
java -versionopenjdk version "22.0.1" 2024-04-16
Install Apache Spark
Next, we'll install Apache Spark itself using Homebrew.
brew install apache-sparkInstall Scala
brew install scala@2.12
scala -version
Scala code runner version 2.12.19
Install pyspark
pip3 install pyspark
# pip3 install pyspark --break-system-packages
pyspark --version
version 3.5.1
Setup Environment Variables:
Depending upon your shell environment zsh or bash setup the below environment variables in ~/.zshrc or ~/.bashrc
# Java, Spark, pyspark
export JAVA_HOME=$(/usr/libexec/java_home)
export SPARK_HOME=/opt/homebrew/Cellar/apache-spark/3.5.1/libexec
export PATH=$PATH:$SPARK_HOME/bin:$SPARK_HOME/sbin
export PYSPARK_PYTHON=python3
export PYSPARK_DRIVER_PYTHON=python3
Apply the envionment variables in the current shell via source ~/.zshrc or source ~/.bashrc
Check Spark Version:
spark-submit --version
spark-shell --version
spark-sql --version
version 3.5.1
Test Apache Spark
To test our setup, let's create a simple Spark application using Python. Create a new file called spark_demo_app.py and add the following code:
spark_demo_app.py
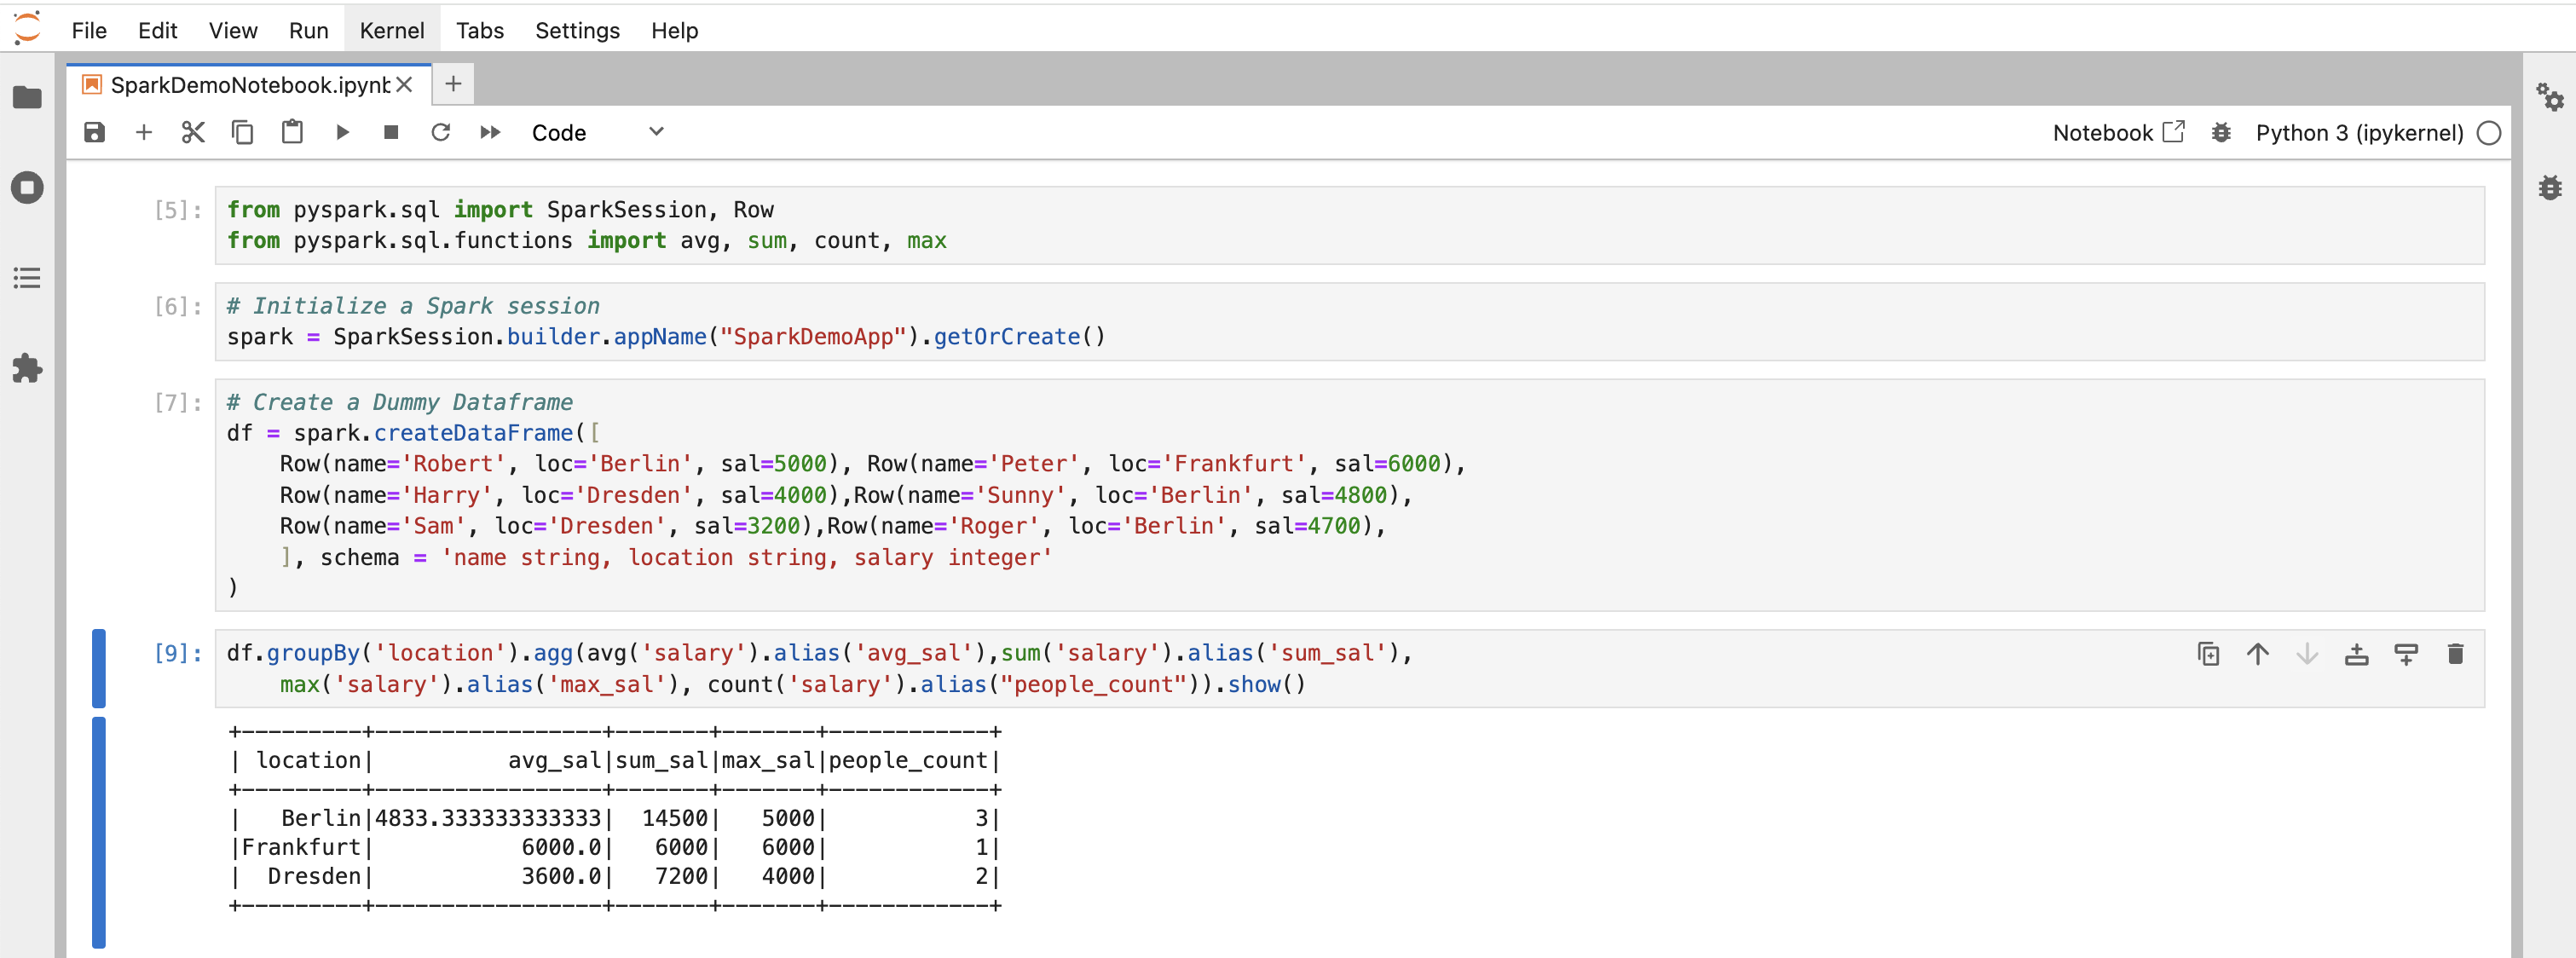
from pyspark.sql import SparkSession, Row
from pyspark.sql.functions import avg, sum, count, max

# Initialize a Spark session
spark = SparkSession.builder.appName("SparkDemoApp").getOrCreate()

# Create a Dummy Dataframe
df = spark.createDataFrame([
    Row(name='Robert', loc='Berlin', sal=5000), Row(name='Peter', loc='Frankfurt', sal=6000),
    Row(name='Harry', loc='Dresden', sal=4000),Row(name='Sunny', loc='Berlin', sal=4800),
    Row(name='Sam', loc='Dresden', sal=3200),Row(name='Roger', loc='Berlin', sal=4700),
    ], schema = 'name string, location string, salary integer'
)

df.groupBy('location').agg(avg('salary').alias('avg_sal'),sum('salary').alias('sum_sal'),
    max('salary').alias('max_sal'), count('salary').alias("people_count")).show()

# Stop the Spark session
spark.stop()
Run this application using:
spark-submit spark_demo_app.pyInstall Jupyter Lab
Finally, let's install Jupyter Lab to create and run notebooks:
brew install jupyterlabTest Jupyter Lab
Create a new directory called ~/spark_notebooks and navigate into it. Then, start Jupyter Lab using:
mkdir ~/spark_notebooks
cd ~/spark_notebooks

# jupyter lab
jupyter lab --notebook-dir=~/spark_notebooks --preferred-dir ~/spark_notebooks
Access the server at http://localhost:8888/lab to create and run notebooks.
Add a new Notebook and Test the environment.
Spark UI is accessible at http://127.0.0.1:4040/
In this article, we've walked you through the process of setting up Apache Spark with Jupyter Notebook on MacOS. With these steps, you should now have a fully functional Spark environment ready for use. Happy coding!
